The Leica "Experiment" Tab
The Leica “Experiment” Tab, or How to keep your Leica scans in order
Newer versions of the software now call it the “Project” Tab. It’s the same thing.
The Leica software allows you to quickly generate scans and do many sorts of processing on them. Understanding the system and how it is organized is important for keeping track of all your data. One important principle to remember is that no matter how you edit/ process a file, your original data stacks will remain, unless you command the system to delete them. Instead the software will generate copies with your alterations. This can cause the files to multiply faster than fruit flies, so this section will help you keep track of and organize those files.
The Experiment Tab allows the user to access and process individual scans. It is located to the left of the Acquisition Tab at the top left of the Leica panel:
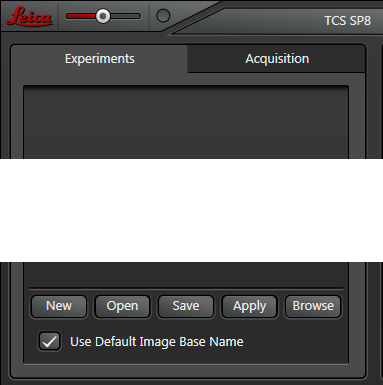
When you first start the LAS-AF software, the panel will be blank. You can generate a new experiment folder by clicking the “New” button at the bottom of the panel. Doing a live scan will also generate a new folder. You can use the “Open” button to bring up an existing folder if you wish to add new scans and/or process existing scans.
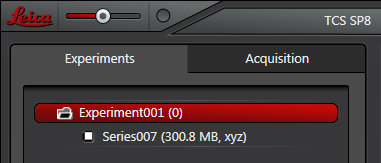
The experiment is represented as a folder, which can contain multiple scans, and any processing of those scans. In the above example it contains one XYZ scan. The red highlighting indicates an active folder, i.e., that’s where any further scans and processing of scans will be sent. You can have multiple folders present in the tab, but only one can be active at a time.
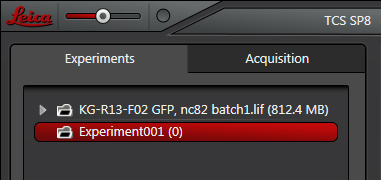
In this example the “Experiment001” folder is active. It has a (0) on the right to indicate that it is empty of any saved scans. Once scans are added, the combined size of all the files will be indicated (like the top folder, with 812.4 MB worth of scans).
If you accidentally start a scan with the wrong folder active, you can drag and drop that file into the desired folder after the scan is finished.
One of the best ways to keep track of data is to name your new folders and scans as soon as you create them. Right-click on the folder to open a new panel.
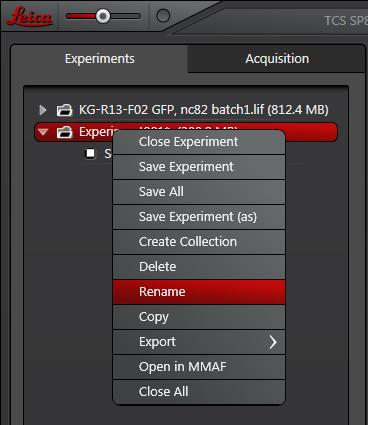
Select “Rename “. Choose names that will help you find/recognize the experiments quickly. Your initials/name, the date of the scans, and shorthand identifying the specimens are good choices. If you include forbidden symbols, the software will scold you and revert back to the old name.

A very important fact about .lif files- only the name of the experiment/project (i.e. the folder icon at the top of the list) is visible to a computer search function. It CANNOT see inside and find individual scan names. If you’ve misplaced an .lif file and you are trying to find it on one of our computers, do NOT enter search terms based on names of individual scans. Use the experiment/project name. Writing those names down in your lab notebook will save you much time and anxiety.
You should also rename each scan, especially before you do any sort of processing on them. Terms like genotypes, treatments (or lack thereof), tissue type, and antibodies/markers used will help you keep your scans in order.
Multiplying the files
Any kind of processing will generate new files. For example, when you right-click on the images in right side display window, you have an option to generate a snapshot:
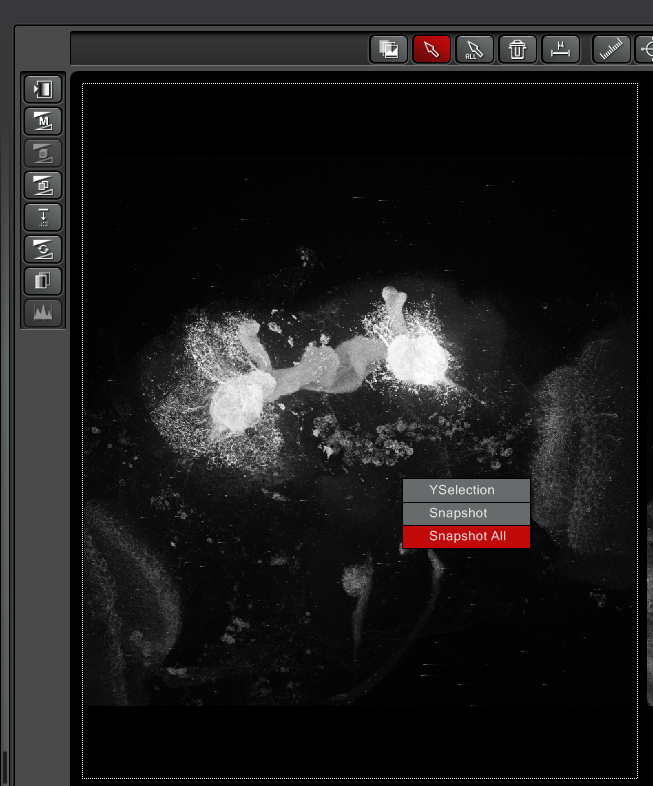
The snapshot file will show up in the experiments tab:

Note that a snapshot has a different icon on the left (a multicolor page), “Snapshot” is included in the name, and it is an xy format file. The original xyz files used to create the snapshots remain.
The “Process” tab (just to the right of the “Acquire” tab) allows you to do many useful things to your data files, such as cropping Z or T stacks, mosaic merging of a tile scan to produce a combined image, and Dye Separation. These actions also generate new sub-files off the original. The files are always listed top to bottom by their ages, NOT their names. The oldest files are at the top and the most recently generated files at the bottom.
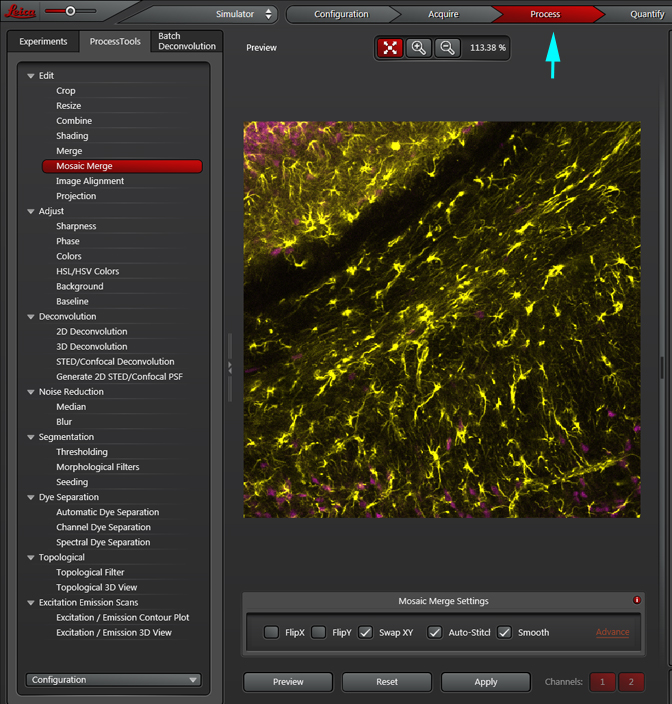
All your processing options
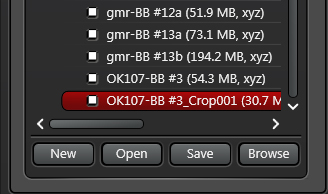
For example, editing a z-stack (as in generating a new z-stack file from part of the original stack) produces a new file in the folder that is named after the original, and includes “Crop001” in the name. Infinite numbers of cropped files can be created, and will be numbered accordingly (“Crop002”, “Crop003”, etc.).
4 more right clicks of interest:
The export function (right click on the file of interest) allows you to use your data stacks to create new files in different formats:

These are NOT saved in the original .lif folder, but instead in a separate folder that you designate.
The “Properties” option opens a very useful window that shows you the meta-data (your scan settings):
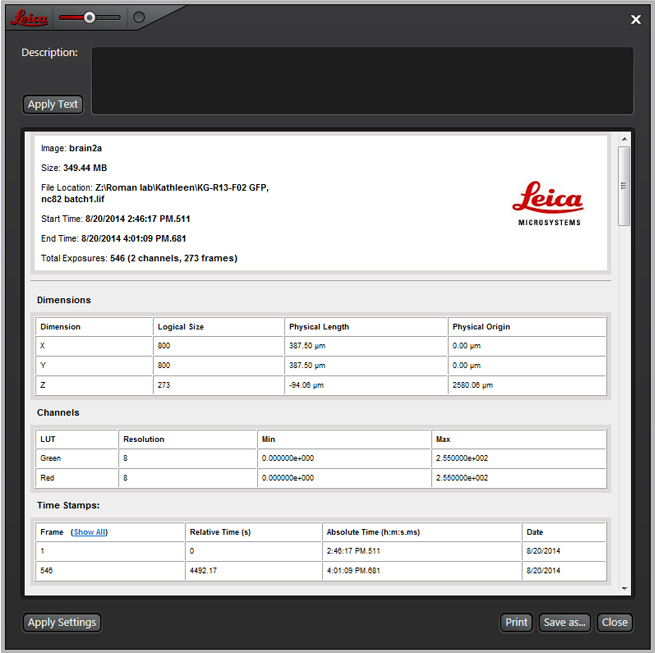
The “Apply Settings” button will allow you to change many of the current software parameters to those from the selected experiment. Any sequential scan settings, lasers used (and their levels), and detectors specified will be applied. Parameters such as format and scan speed will NOT, so you must set them separately.
A new experiment folder is not automatically saved. Sooner rather than later, you should save the experiment to the Core workstation. After right-clicking and selecting “Save Experiment” chose the “LASAFData-Shortcut” as your destination. This folder contains the storage folder for all the labs that use the Core. Find the folder with your PI’s name (or create one if you are the first person in your lab to use the Leica SP8) and save your experiment there. Once you save it, it will appear as a “.lif” file in the windows. This type of file can only be opened/ manipulated with the LAS-AF software. We have a copy of this software on our Core Workstation computer, which can do everything the copy on the Leica computer does, except for 3-D renderings.
If you wish to delete a file, select the delete function. A window will pop up to ask if you really want to delete. If you hit “yes”, that file is gone forever from that folder. If you opt to close an experiment with unsaved file, another fail-safe window will appear to give you the option to save the changes.
One cautionary note- we have found one way to delete a file by accident. It can happen if a folder is open on both the Leica and workstation computers, changes are made one machine, but the older version gets saved on the other machine. Therefore we do not recommend having your .lif files open on both computers at the same time.
