Leica TCS SP8 Startup / Shutdown
5-11-2023 Update
Turning on the System
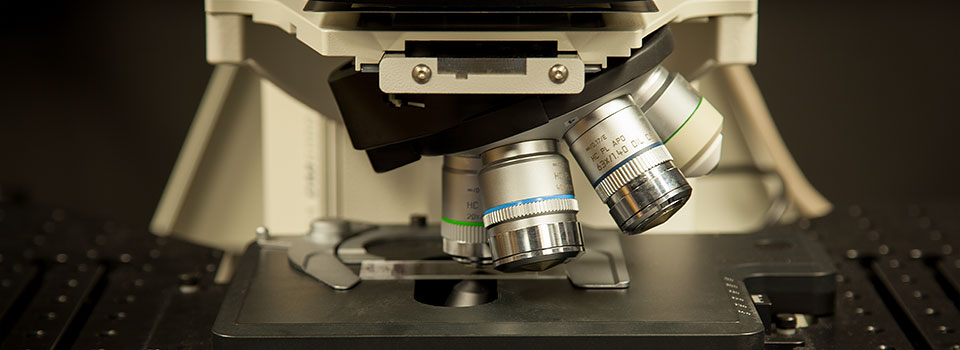
1) Uncover the microscope, then check the stage . The 10x objective should be in the home position, over the condenser (cyan arrows). The sliders on the stage insert should be pushed to the sides (red arrows).
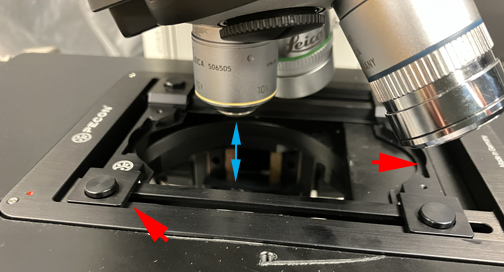
If the stage does not look like this, rotate the objective turret and/ or carefully push the stage insert sliders.
We are now leaving the stage insert in, to avoid bending it. We are also keeping the stage initialization off, unless a user wishes to do a tile scan. If you are planning a tile scan, you need to include it in your Booked reservation, and the Core manager will calibrate/ initialize the stage before your imaging session.
2) Sign up in the logbook. Fill in the date, your name, your PI’s name, and your actual start time. You will fill in the rest when you end your session.
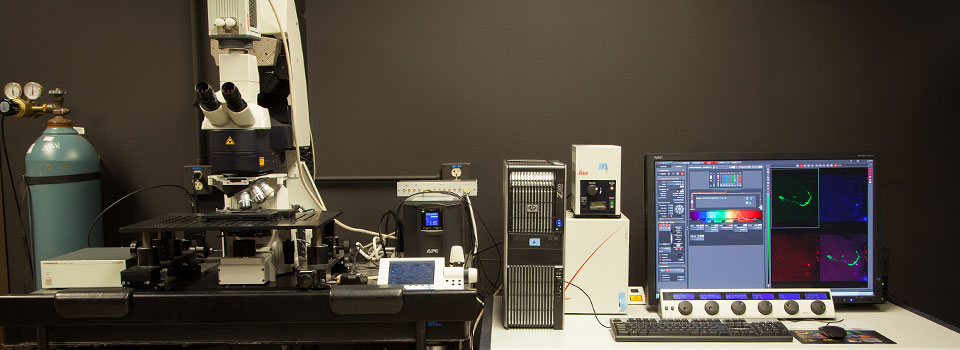
3) Turn on the mercury lamp power source (#1): The green power light and the yellow shutter light will come on. The first and second intensity levels are usually sufficient to observe fluorescence through the eyepieces. Once turned on, the lamp should remain on for a minimum of 30 minutes. Do not turn the lamp off if another user is scheduled within 2 hours after your use.
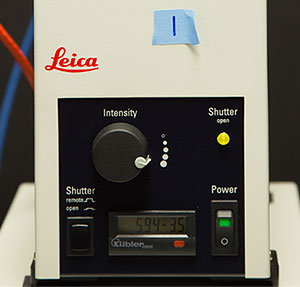
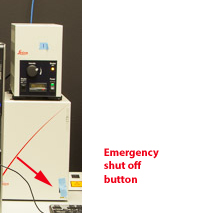
4) Switch on the first green button (#2A) (PC/Microscope) on the TCS control panel. While we have disabled the stage movement, computer glitches can happen, so it is your responsibility to watch the stage for a moment after flipping button 2A. In the unlikely event that it does move, you want to make sure that the objectives do not collide with anything on the stage- which will be unlikely if the stage is set up as pictured above. In case of a emergency you can switch off the button on the control box covered with blue tape (underneath the mercury lamp).
The computer no longer starts up on its own, so you will need to start it manually (#2B).

5) After about 15 seconds, switch on the buttons/key in the following order:
Scanner Power (#3)
Laser Power (#4) (this is actually the fan that cools the argon laser)
Turn the laser key (#5) clockwise from OFF to ON (Laser Emission).
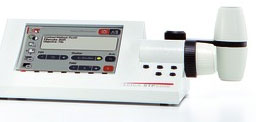
6) Switch on STP 8000 microscope controller (#6) (small switch on the back on the right side). The CRT6500 box (under the mercury lamp) should be on (we usually leave it on), but check the switch on the bottom right corner.
Logging onto the Computer:
For Security Reasons, we have changed our logon system so that all UH users will logon with their CougarNet IDs and passwords. You will be able to access your Lab’s data folder, as well as any other folders on the workstation server to which you have permission, if you have given your CougarNet ID to the Core Manager for inclusion on the permissions list.
1) Press Ctrl-Alt-Dlt to get to the logon screen. You’ll get a CougarNet info screen. Click “OK”.
2) The Computer remembers the last person to logon, and will have that person’s name on the icon. If that’s not you, click “Other User” to get this screen:
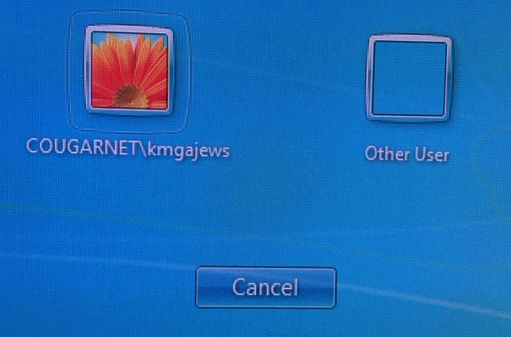
Select the appropriate icon, and enter your CougarNet ID and password.
Starting up the LASX Software:
1) First make sure that the objective turret is locked into a position. If it is loose you will get an error message during the software start up and have to start that step over. This is the icon to click to start the program:

2) Soon after clicking, this Work Mode Panel should appear:
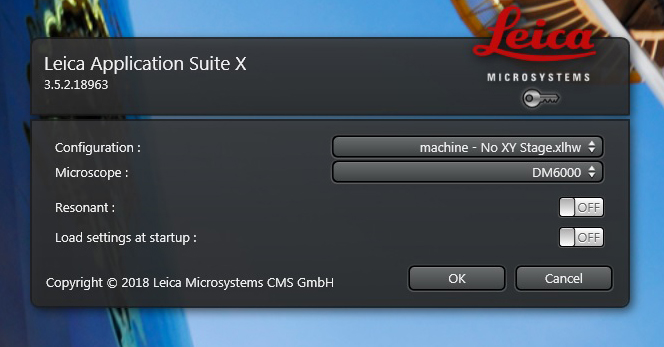
Under “Microscope” the pull down should show “DM6000”. The “Resonant” switch gives you the option the use the Resonance scanner, which you would want if you were doing time-lapse imaging of something very fast. Resonance mode scans at 18,000 Hz, but it does not allow the option to scan at slower speeds. You also cannot switch back and forth between Resonance and regular scan modes once the software is running; you make that choice for one or the other at startup. Under the “Configuration” pull down you will have several choices:
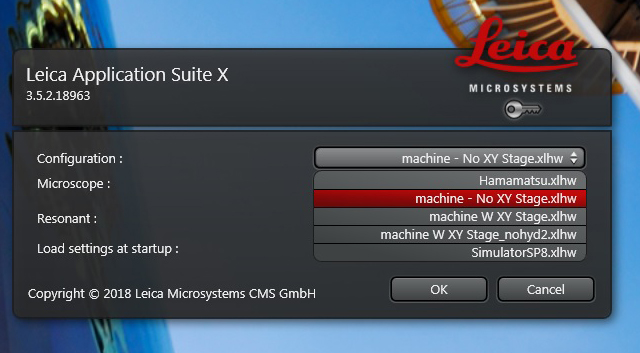
“Hamamatsu” is for using the Hamamatsu camera, which is a different start up sequence and not covered here. “Machine W XY Stage” should be selected if you intend to do a tile scan, i.e., you want to stitch together multiple fields of view into a single image of a large specimen. Otherwise select “Machine- No XY Stage”. You won’t need “SimulatorSP8” and “machine W XY Stage_nohyd2” is for troubleshooting purposes. Click “OK” once you make your selection.
3) Once the software is running, you will need to finish activating the lasers. The classic laser panel option is shown below:
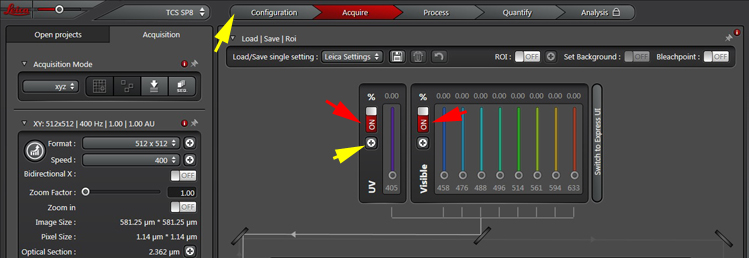
If you have DAPI staining, you will need to activate the 405 laser (left red arrow). For all other laser lines, turn on the “Visible” switch (right red arrow).
To complete laser activation click the “Configuration” Tab or the shortcut button (yellow arrows) to open the Laser Panel.
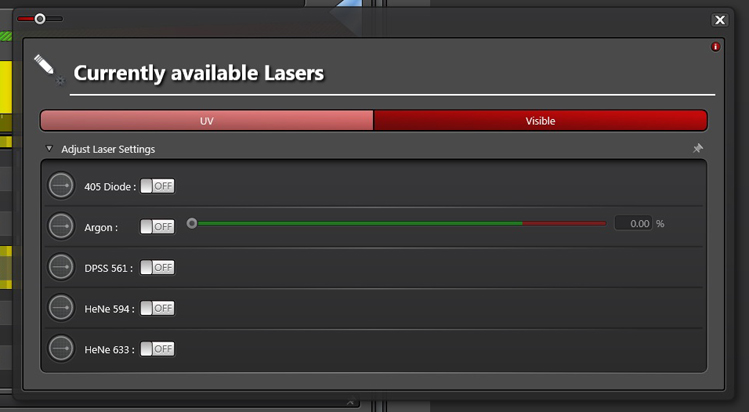
Click every laser line you plan to use to “on”. Set slider for the argon laser (458, 476, 488, 496, and 514 nm lines) to 20% for standard imaging. If you plan to photobleach, set it higher (80% or more). You can return to this panel anytime during your session to turn laser lines on or off.
This completes the activation of the laser lines. You will still need to use the sliders in the main laser panel to assign a power % to each one you use.
2 additional adjustments to make to the controls:
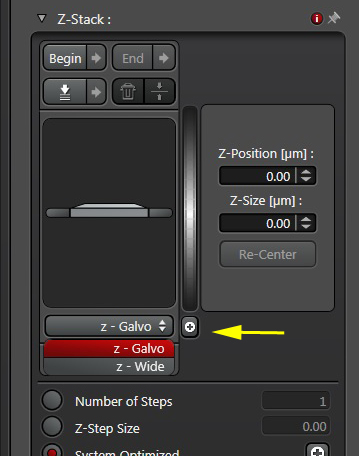
1) Change the setting on the Z-panel from “Z-Galvo” to “Z-wide”. If you don’t do this, the focus knob on the UBS panel (knob #6 on the far right) will not respond. Speaking of that knob….
2) Open the USB Control Panel:

Use the pull down menu to adjust the knob sensitivity to 10 uM per turn (which we have found to be optimal for almost all scans):
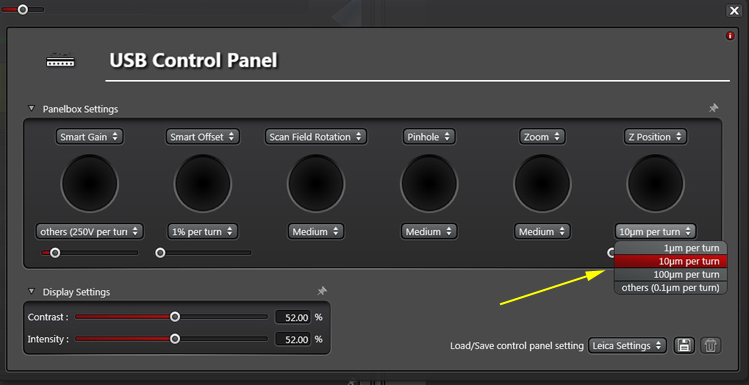
Now the system is ready to perform your scans.
Ending Your session- the Shutdown Process
Before you turn off the microscope, check if there are other people who have signed up to use it after you. If you cancel your reservation, please try to do it no later than 3 hours before your reservation time, otherwise please contact the people before you or the Core manager to insure that they don’t leave the microscope on for you.
1) But whether you are just closing the software, or shutting down the whole system, the first step is always CLEAR THE STAGE. Move the objectives up, and turn them away if needed to make room to remove your specimen.
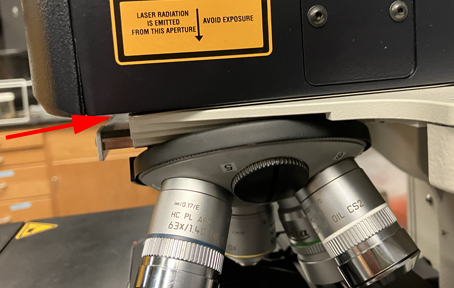
2) Make sure that the objective turret is raised to the top position. There should be no gap between the top of the turret housing and the rest of the microscope body (red arrow). Carefully push the sliders to the edges of the stage insert.
3) Clean the objectives. The oil and ceramic dipping objectives should be wiped clean with lens paper (in a box on the air table). Wipe the 10x objective too in order to make sure there is no oil on it. Also wipe off the stage insert if any oil or fluids from the specimens are on it. Put the 10x objective in the home position.
4) Finish your logbook entry. Write down your finish time (don’t worry about whether it exactly matches the time you reserved on the scheduling calendar). Also indicate which objectives you used for imaging, and if there were any problems with microscope operations (lasers not firing, software crashes, controls not responding, etc.). It is very important to have a written record of problems so that we can justify any service visits.
5) Check the scheduling calendar to see if anyone else has signed up to use the Leica SP8 after you. If there will be another user within 3 HOURS, your only responsibilities will be to shut down the software (step 6), logout of your account, and indicate in the logbook that you have left the system “ON”.
6) Reopen the laser panels, set the argon laser slider to 0, and then turn all the laser line switches off. Exit the LASX software by clicking the “X” in the top right corner of the screen. If you haven’t saved the most current version of your files, the system will remind you.
7) If you are leaving the system on, just logout. You don’t need to do anything else. If you are turning it off, shut down the computer instead.
8) Once the computer is shut down, you can switch off the other parts of the system. IMPORTANT NOTE: you will not the shutting things down in the reserve order of the start up.
Turn off the fluorescent light source (#1).
Turn off microscope control panel (#6).
Turn off PC power (#2A) and scanner (#3).
Turn the “Laser emission” key (#5) counter-clockwise to off, but leave the laser power button (#4) on for at least 5 minutes. This keeps the fan running, which helps cool the Argon laser and will maximize its useful life.
When the fan noise drops in volume (you’ll hear it), you can switch off button #4. You are not obliged to wait for this; it is OK to leave it on, and I will turn it off at the end of the day.
9) Cover the microscope with the dust cover
10) Make sure the computer desk, air table, and microscope are clean.
