Leica-Live Imaging
Live imaging
The scan modes with the time dimension (xyt, xyzt, etc.) allow the user to take a defined number of images over a specified period of time. With these modes you can record changes in specimen structure and/or alterations in location/concentrations of labeled molecules.
If you need to do sequential scans to avoid bleed through of fluors, you should select the “between lines” mode.
The time panel
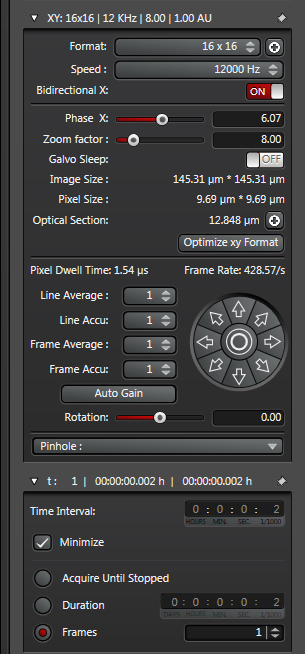
Scans with a time dimension open the t panel underneath the xy panel:
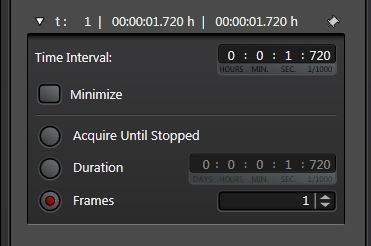
The “Time Interval” denotes how often the system can collect an image. The duration of your scan can be set directly, or indirectly by setting the number of frames and the interval. There is also the option to stop the scan manually (“Acquire Until Stopped”).
How to get the right speed.
As a general rule, the speed of your image acquisition should be about 2.3 times faster than the event you wish to record.
As an example, let’s say you wanted to record a change in fluorescence intensity of live cells upon some stimulus, and the event takes 250 ms to happen. A time interval of ~100 ms will be sufficient to record the event. How do you get that time interval using the regular scanner?
The first thing you should do is check the “Minimize” box in the time panel. This will give you your speed limit, i.e., the smallest possible time internal between scans that your current choice of settings allows.
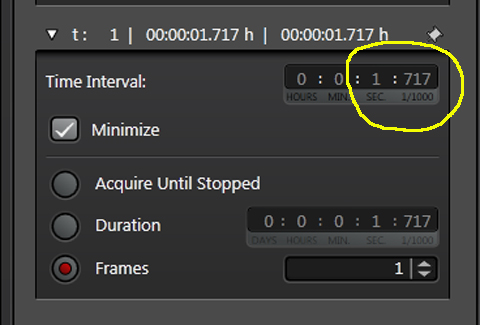
In this example the limit is 1,717 ms, which is far too slow for the experiment. If you just try to reduce the interval by typing in 100 ms without changing other, relevant settings, the software will reject your setting change (unfortunately it won’t give you a “you can’t do that” kind of feedback), and revert back to the original limit. To get the limit down to at least 100 ms, you will need to adjust several scan parameters in the XY panel.
These parameters (*) are defining the 1,717 ms limit:
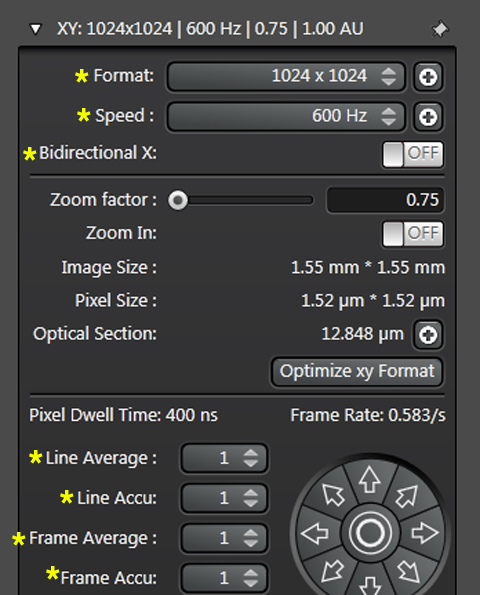
One option for faster scanning is to switch to a bidirectional scan mode. In the standard mode, the laser scans in one direction (x), then returns without scanning, moves to the next line (y), and scans again. In bidirectional mode, the laser scans the line in one direction, moves to the next line, then scans on the return pass:
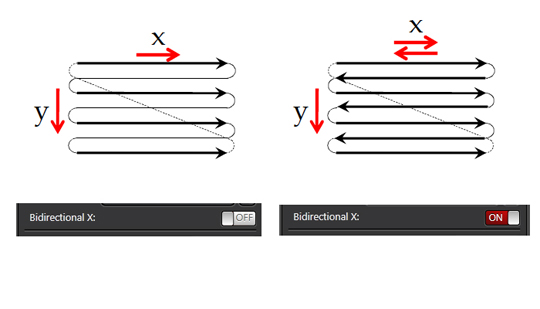
Bidirectional scanning will double your speed:
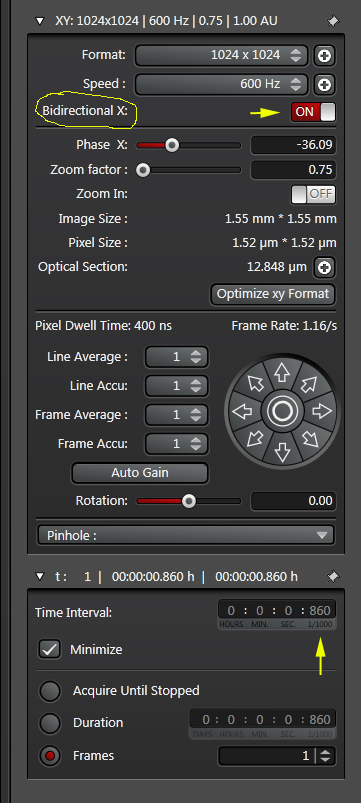
The Phase X option appears after Bidirectional is selected. There is a chance that there could be an offset between the rows scanned in the forward pass and those scanned on the return pass. Phase X is used to compensate for that. It can be set for values from -100 to +100; the setting you want will be influenced by the direction and intensity of any offset, and will have to be determined individually for each experiment.
Increasing the scan speed will also reduce the interval time. With the regular scanner, 1800 Hz is the fastest setting:
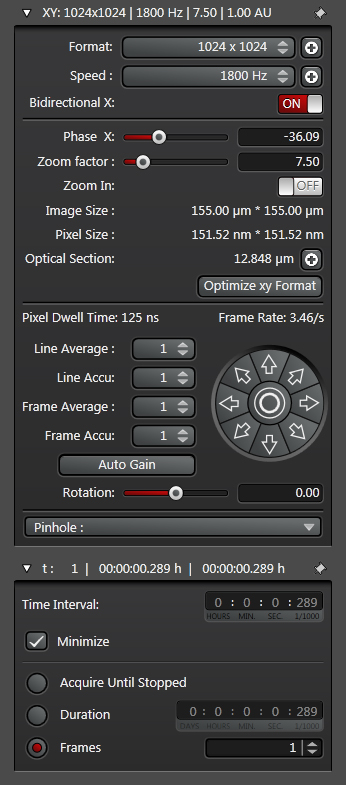
This reduces the interval to 289 ms, much closer but still not quite at the goal of 100 ms.
One last adjustment you can make is to reduce the size of the format. Switching from a 1024 x 1024 xy plane to a 1024 x 256 size will decease the time needed to scan each frame:

Now the time interval has been reduced to 76 ms, which will be fast enough to give you quality data for your live imaging experiment. Of course in reducing the size of the frame, you will be imaging fewer cells/ less tissue, so you will have to balance speed gained with field of view lost.
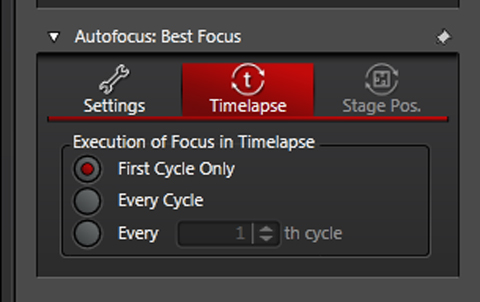
Other things than can affect the scan speed are line/frame averaging/accumulation and autofocus. Unless your signal is very weak, the averaging/ accumulation menus should be set at 1. If z-drift is an issue, you will want to use autofocus, but you can control how often the software will stop and check the focus:
If you have the need for even more speed, you should select the resonant scanner during startup:
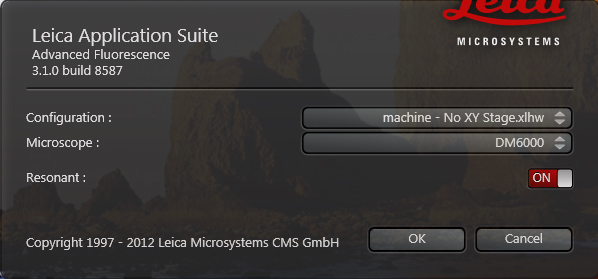
It has only one scan speed setting (a blazing fast 12000 Hz), but it can be slowed down if needed by choice of scan parameters.
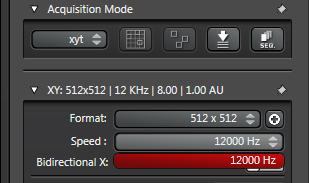
Taking the settings to the most extreme with the resonance scanner selected, you can lower the time interval to 2 ms!
