FV1000 4D editing
Often when live cells are imaged in a time-lapse experiment, the researcher will scan a very wide field and image many cells. This increases the chances of catching a rare event, or just improves the odds of getting an ideal series of images. But this will produce very large files with lots of extra space that needs to be cropped out to isolate the region of interest.
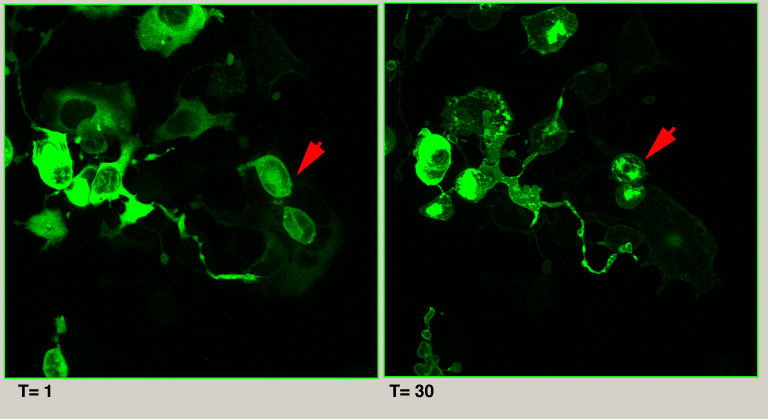
The file used in this example is an XYZT scan with one fluorescent channel. It is 512 x 512 in the XY dimensions, has 53 Z-stacks and 30 time points, with a total size of 835 MB. The crop in the example will isolate the images of the 2 cells indicated by the red arrow. These cells change shape and position in the XY plane from time frame 1 to time frame 30. They also move down along the Z-axis. The cropping process will remove area that does not contain any information about these 2 cells.
Basic XYZT cropping using “Partial Open”
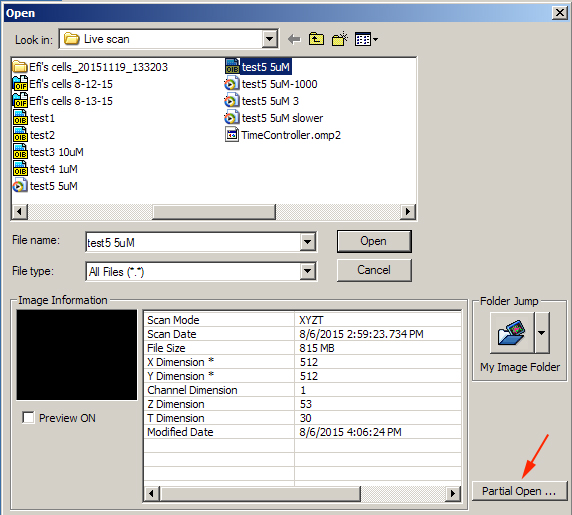
Using the “Open” function in the “File” drop down, highlight the file you wish to open and click the Partial Open” button at the bottom right of the window:
This opens the “Partial Open” editing window, which allows you to crop files in 5 different dimensions (X, Y, Z, T, and Ch):
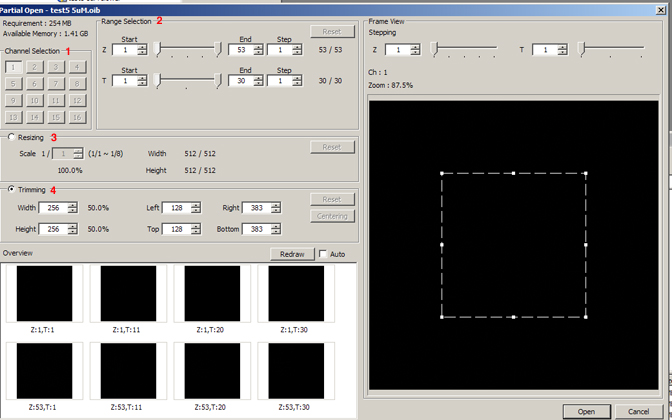
The cell movie example has only one channel, and did not need resizing, so the next sections will focus on editing option for the XY-ZT dimensions.
Z and T dimension editing
The Range Selection panel (2) can be used for trimming of Z or T-stacks.
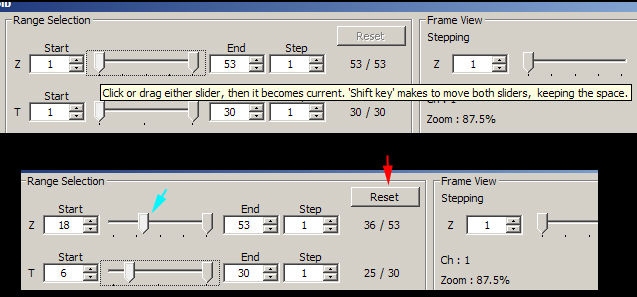
Use the sliders to select new start and/or end points. Reset restores the original start and end points.
Cropping the X-Y plane
The cropping indicator (dashed lines) in the “Frame View” panel always starts out centered. You can use the trimming panel to type in a reduced size (here showing a 50% reduction,) 512 to 256. Another option is to type in left/right top/bottom coordinates. In addition you can directly manipulate the cropping indicator with the mouse; this allows you to move it around the frame and expand/contract it.
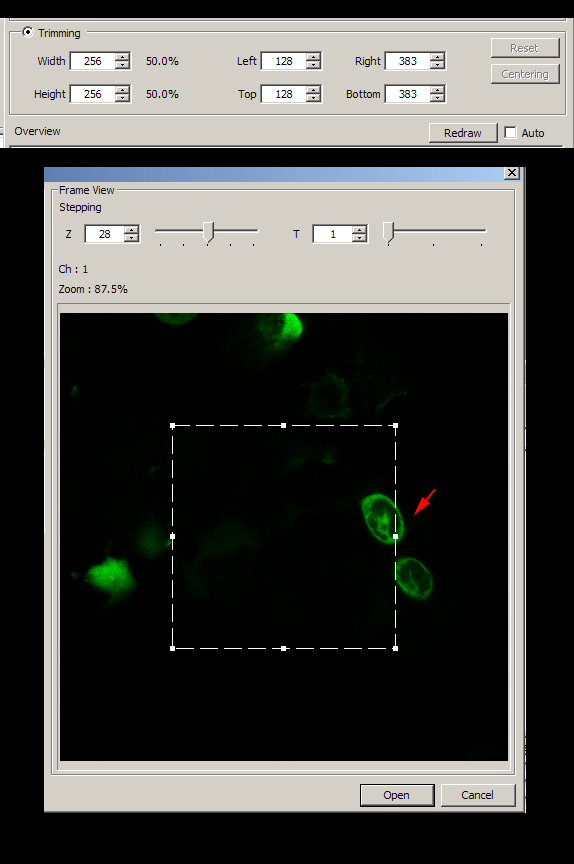
In this example, the two cells indicated by the red arrow are the portion of the field to be included in the cropped image. Since they do move over the course of the scan, you should use the Z and T- stepping slides on the top of the panel to determine their path in the field and how much space you can crop out.
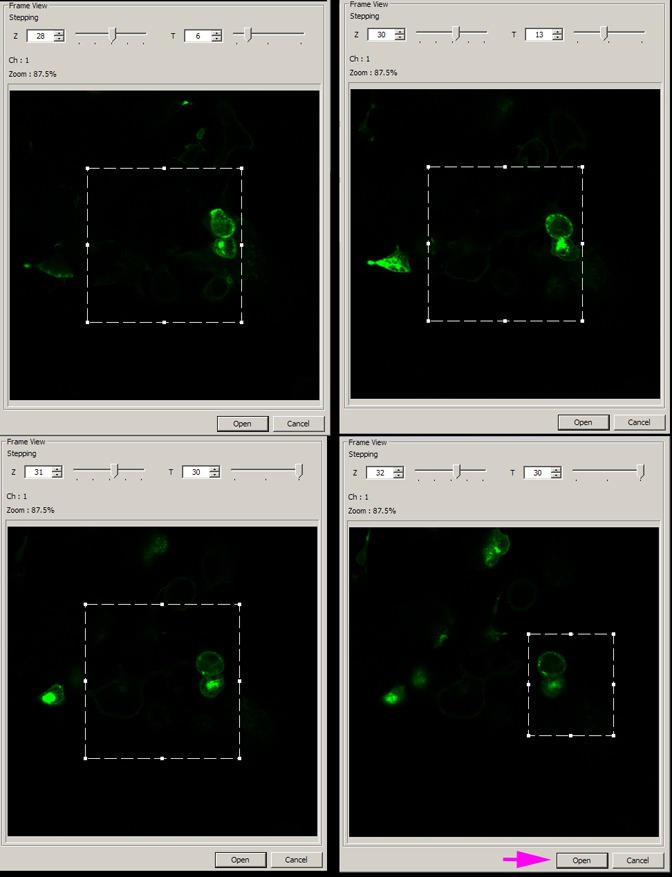
Once you have determined the area you wish to keep, click open. This will open the edited file in a new 2D view window (“Partial Open” will be added to the file name). The new file in this example is 90 MB, a considerable reduction in file size.
More advanced Z-T editing
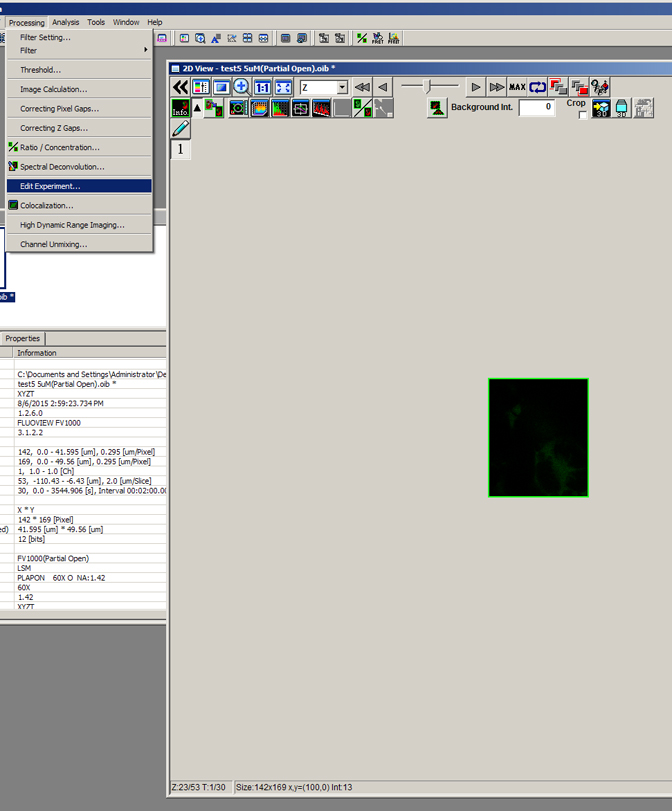
Z- slices with no signals can be merged into those with images without affecting the quality of the final image, but they do add to file size. In this example most of the cells are around 12 slices in thickness (out of 53 total slices), so cropping the X-Y dimensions down will result in much empty space in the Z axis. In time scans where the specimens move up or down in the Z dimension, using the range selection option, which makes the same Z-edit across ALL the time points, runs the risk of cropping away some of the data. More precise Z cropping can be achieved by selecting “Edit Experiment” from the “Processing” pull down menu:
The “Extract Series” option with give you a grid representing all Z, T coordinates.
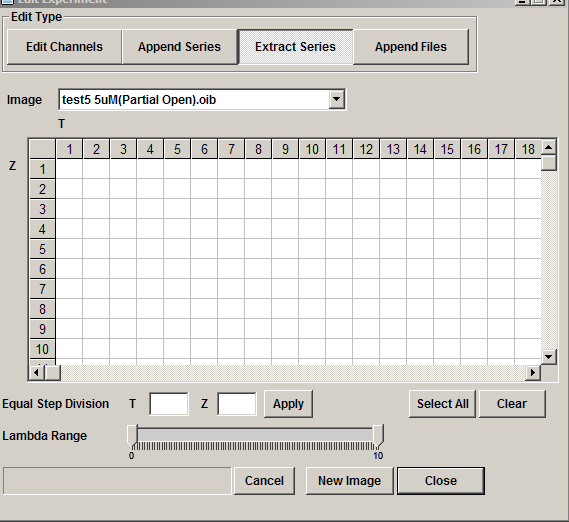
Use the Z and T sliders in the 2D Viewer window to determine which Z-slices contain images of the 2 cells. The coordinate numbers of each Z, T point are indicated in the bottom left corner. In this example there are images from Z21-Z32 in time points 1 and 2 (12 out of 53 z-slices). Click on the corresponding squares on the grid in select them.
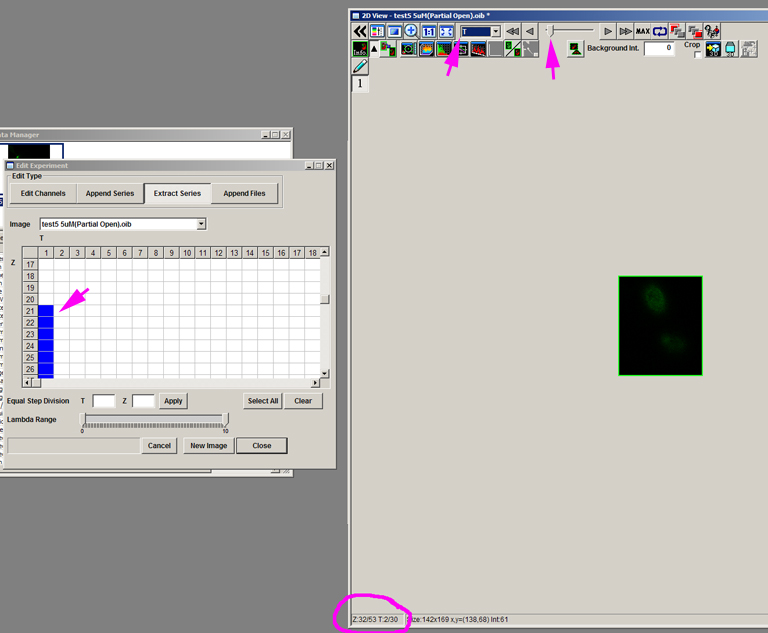
Repeat this for all the time points you wish to include. In this example the cells drift down the Z-stack. Since all time points must have the same number of Z points (in this case 12), if the start point shifts to Z22 to follow the movement of the cells, then the end point shifts to Z33, etc.
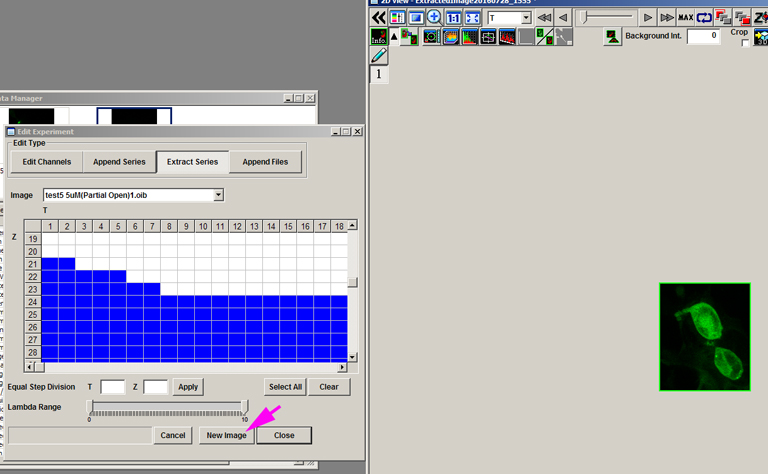
Click “New Image” to generate the cropped file. This new file has been reduced in size to 20 MB.
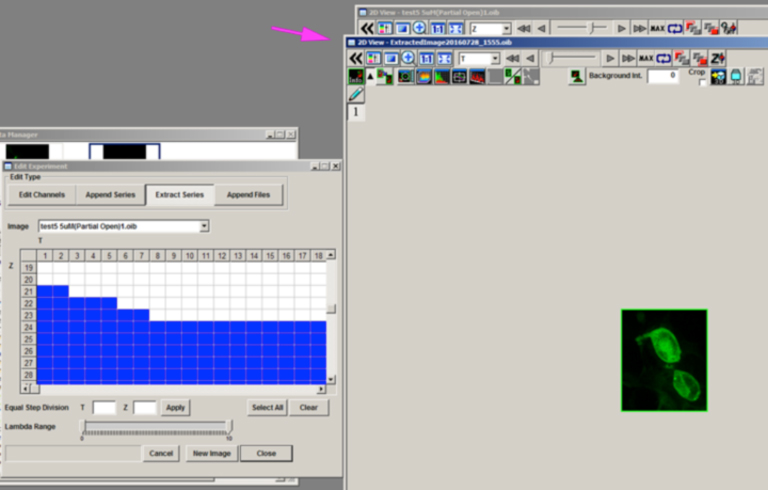
(Thanks to Satyabrata Pany, from Joydip Das’ Lab, PPS, for these images).
