


FRAP- Leica SP8
Fluorescence Recovery After Photobleaching (FRAP) is useful for studying the motion of molecules within living cells. The basic concept is to use a very intense laser pulse to photobleach a fluorescent marker in a portion of a specimen, then record the return of fluorescent signal into the bleached area caused by diffusion of unbleached fluors. Such experiments, when designed carefully, can show whether a molecule of interest is freely mobile, immobile (bound), or restricted to certain organelles/regions of the cell. Variations on FRAP (such as photoactivation) can be used to observe processes such as vesicle fusion, protein trafficking, and cytosketelton changes in real time. The availability of photo-activated fluors, as well as photo-switchable fluors allows for a variety of experimental designs using the FRAP setup.
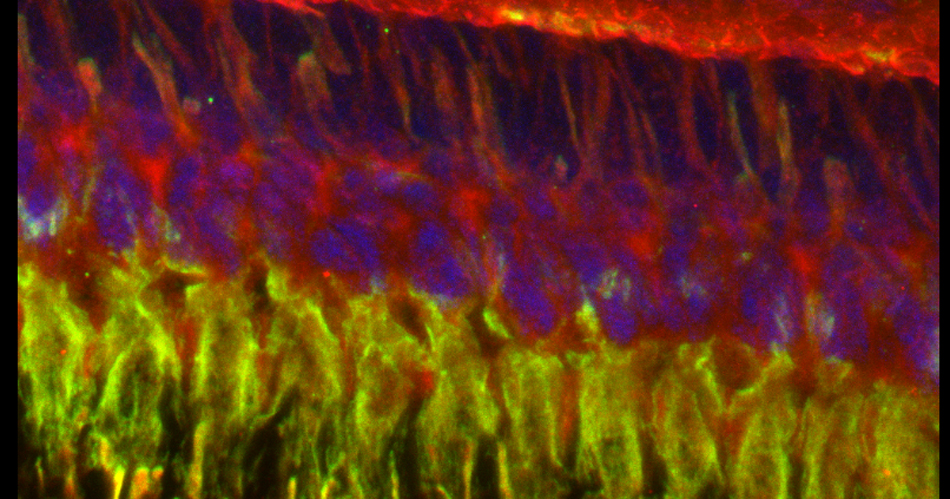
Here is an example of a basic FRAP experiment using the Leica SP8. The specimen is a fly brain explant, expressing a YFP-tagged protein in the mushroom bodies. The protein is unbound in the cytoplasm, therefore fluorescence should return to a photo-bleached region via diffusion.
Select the FRAP wizard from the pull down:

The “Overview” tab will list and describe to steps for setting up a FRAP experiment.
The “Setup” tab is used for adjusting up your imaging settings, just as you would with a standard confocal scan. You can use either the xyt or xyzt scan mode, as well as the Sequential scan mode if needed. Find your ideal focal plane(s) and adjust the detectors to optimize the image of your specimen. For this application you do NOT want to have any greens pixels in the background. These will be your parameters for both pre- and post-bleach imaging. Since the bleaching step usually requires high laser intensity, you should use the PMTs, rather than the HyD detectors for FRAP experiments.

The next step is to set up your bleaching conditions. You are not required to use the same lasers that you used during the “setup” step. For example, if you are using a version of GFP that photoactivates upon exposure to 405nm light, you would use the 488 laser in the Setup, but specify the 405 for the bleaching step. In this example we are using the 514 laser to photobleach (which is the same laser used for imaging), set to 100%. The optimal settings for your experiment may be different, and you are advised to experiment with different settings to find out what works best, but you will likely have the laser turned up very high.
This example is using the ROI option, which allows you to use the ROI tools above your image to draw one or more ROIs to be bleached.


The “Fly Mode” setting is useful if your fluorescence recovery happens very fast. It allows for resolution between lines, as opposed to between frames, which reduces the time resolution down to 0.35 ms. The forward line scan bleaches, while the return scan is used for post-bleaching imaging.
“Zoom In”- This is recommended for most scans. It will minimize the scan field, which means more laser light applied to the ROI.
“Change Bleach Format”- this option is useful if you wish to speed up the bleaching when using 10 or more bleach intervals. It reduces the number of lines scanned during bleaching. It will probably not be needed for most applications, but all users must determine that for themselves.
“Set Background to Zero” -This setting will prevent areas near the ROI from being exposed to the bleaching laser. It should be on if you are using the “Fly Mode” or “Zoom In” options.
“Delete Bleach Images after Scan”- Also recommended. If your goal is to quantify the changes in your fluorescence levels, the time points of the bleach aren’t going to contribute useful information and may in fact interfere with quantification.
“Use Laser setting for all ROIs”- If you are bleaching just one ROI, or multiple ROIs with the same laser, click this on. But if your experiment needs different lasers for different ROIs, click it off. You then have the option to click “ROI Configuration”, which opens this window:

This window will give you a choice of all available laser lines for each ROI drawn.. Don’t forget to turn them on (and at least to 90%) in the laser panel.
The final step is to define your time course, which is divided into pre-bleach, bleach, and post-bleach segments.

“Iterations” are the number of images taken in each segment of the time course. “t/interation” is your speed; in this example the laser will scan the specimen every 1.293 seconds. Clicking “minimize” will set the speed to the fastest allowed by your settings (your “speed limit”). Ideally your imaging speed should be 2.3 times faster than the process you are recording. For advice on increasing your scan speed, go HERE.
If you want to record images at a rate slower than the upper limit, unclick “minimize”.

You can now type in the numbers you want.
“Repetitions” will allow you to repeat a bleach/post-bleach imaging cycle. This can be helpful for photo-activation experiments when multiple rounds of activation are needed. The right amount of bleaching in terms of number of bleaching rounds and the time of each round will vary with individual samples and types of experiments, i.e., you will need to play with it to determine what settings work best for you. So if you are trying FRAP for the first time, prepare plenty of practice specimens and take notes!
Likewise the speed and number of post-bleach frames imaged will depend on how fast the recovery process is for your particular specimens. You can click the “+” next to “post bleach 1” to add up to 2 extra post-bleach panels, if needed:

The time line at the bottom (red arrow) shows you the time points when each segment starts, and will also track progress as the experiment runs.
Once everything is set, start the experiment.
Pre-Bleach step:

Bleaching step (with “zoom in”):

The beginning of the post-bleach segment (bleached region indicated by a yellow arrow):

Later in the post-bleach segment (you can see the return of fluorescence into the bleached region):

When the post-bleach imaging is finished, your data can be displayed as a graph with the “Evaluate” tab.

The white arrow points to the pre-bleach portion of the time course, and the red arrow to the beginning of the post-bleach segment. You can also generate movies of your images with the LAS-AF software. To see both pre and post-bleach values on the graph, make sure you have selected the folder for the whole experiment (yellow arrow), instead of the sub folders for just the pre or post-bleach images.
Depending on what sort of formulas you are using to define the change in florescence, you may need to draw some control ROIs. In this example, 3 more ROIs have been added: ROI2 (purple square) which defines the background fluorescence outside of the structures of interest (one half of the mushroom body complex), ROI3 (cyan circle) from a part of the mushroom body that was not photobleached, and ROI4, which is drawn around the whole mushroom body half.

You can export the fluorescent intensity values for each ROI at each time point by right clicking on the graph and choosing the option to export to Excel:

Coming soon-how to use the Frap wizard with photo-switchable proteins.